
Why should we pay attention to this tiny part called a window handle?
Windows are the eyes of a building, the bridge connecting indoors and outdoors. Window handles are the “eyelids” of these eyes, crucial for opening and closing, locking, and ventilating. In our daily lives, we turn, push, and pull them countless times, often overlooking their existence until one day—when they become loose, difficult to turn, or even break, or their worn-out appearance clashes with the carefully decorated interior—that we realize the seriousness of the problem.
Conventional wisdom holds that replacing window components is a major undertaking, requiring disassembly of the sash or even the entire frame, time-consuming and labor-intensive, and requiring specialized tools and skills. This belief deters many, leading them to either accept a malfunctioning or unsightly handle or incur the high cost of a professional repair. Today, however, we’ll debunk this myth once and for all. This article will provide you with a highly detailed guide on how to safely, quickly, and efficiently replace your old window handles with brand new ones, without disassembling the entire window, using only simple tools. This way, your windows will feel smooth, secure, and beautiful again.
Part 1: Know Yourself and Your Enemy—Understanding Your Windows and Handles
Before you begin, thorough preparation is half the battle. Understanding your window type and handle structure is key to avoiding misoperation and purchasing the wrong accessories.
Common Window Types and Handle Locations
While you won’t be disassembling your window, understanding window types will help you understand how handles work:
Casement Window: The handle is typically located on the side of the sash, rotating to control a multi-point locking mechanism for opening and closing.
Sliding Window: The handle is located in the middle or edge of the sash, usually a pull or catch, for easy sliding.
Tilt/Top-Hung Window: This is one of the most complex window types. The handle controls different opening modes (tilt or casement) by varying the rotation angle.
Core Structure and Working Principle of a Window Handle
A typical window handle consists of the following components:
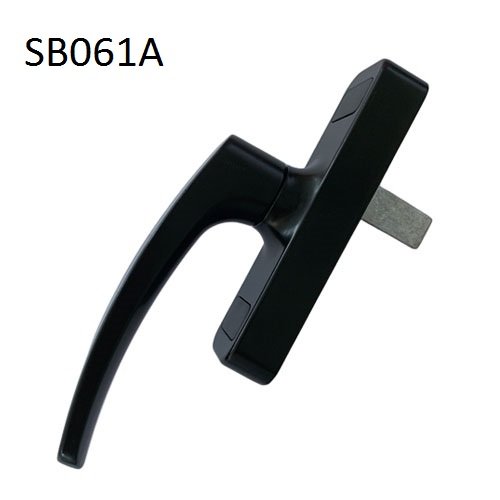
Handle Body: The part we directly operate.
Base: The part that connects the handle to the window sash, usually secured with screws.
Drive Core: This is the most critical component. It’s a rectangular metal rod that inserts into the window’s actuator. The rotational force of the handle is transmitted to the window’s locking system through this square core.
Screws: Typically hexagonal or Phillips/slotted screws, they secure the handle to the base or directly compress the square core.
How it works: When you turn the handle, force is transmitted through the square core, causing locking points (or locking posts) around the window frame to extend or retract, thereby locking or opening the window.
Why can you keep the window open? — Technical Principle Analysis
Replacing the handle involves replacing the driving component (the handle and square core), not the actuator (the locking points on the window frame). As long as the new handle fits perfectly with the old driving square core (or a new matching square core), it can activate the existing locking system. The entire process is like replacing a faucet handle, without having to replace the entire plumbing system. The entire operation is performed inside the window sash, without touching the connection between the window frame and the wall, and therefore, there’s no need to dismantle the entire window.
Part 2: Sharp Tools for Good Work – Tool and Material Preparation
Having the right tools and accessories will make the replacement process much easier and avoid damage to the window.
Required Tool List
Screwdriver: A set of flathead and Phillips screwdrivers, or a set of multi-purpose screwdrivers. These are the most commonly used tools.
Hex wrenches: These are the most commonly used tools for securing window handle screws. Be sure to have a set of different sizes.
Tape measure/vernier caliper: Used to accurately measure the size of the square core and the distance between the holes, which is crucial when purchasing a new handle.
Pliers: Used to assist if a screw is stripping. However, be careful not to scratch the profile.
Lubricant: WD-40 or solid grease is used to clean and lubricate the old transmission mechanism.
Soft cloth: For cleaning and protection.
Flashlight: Provides good lighting for observing the internal structure.
How to Choose a Matching New Window Handle?
This is the most error-prone part of the entire project. Please follow these steps carefully:
Step 1: Critical Measurements and Observations Before Removing the Old Handle
Measure the core dimensions: The core width is a key parameter. Common sizes include 7mm, 8mm, 9mm, and 9.5mm. Use calipers for precise measurement; even a 1mm error can prevent installation.
Measure the hole spacing (center-to-center distance between the two screw holes that secure the handle): Common sizes include 32mm, 40mm, and 50mm. This dimension determines whether the base of the new handle will overlap the old mounting holes.
Observe the installation method: Is it through-hole (screws are screwed in from the front of the handle) or concealed nail (screws are screwed in from the side or bottom)?
Take photos: Use your phone to capture the details of the old handle, including its mounting location and internal structure, from multiple angles for comparison and reference during installation.
Step 2: Determine the material and style
Material: Common materials include aluminum alloy, zinc alloy, stainless steel, and plastic. Zinc alloy offers high strength and a pleasant feel, making it a popular choice.
Style and Color: Choose a style that matches your home decor and window color, such as modern, minimalist, or European classic. Common colors include silver, white, black, and bronze.
Step 3: Purchasing Channels
It is recommended to prioritize local building materials markets or reputable online platforms (such as Tmall and JD.com’s brand flagship stores). When purchasing online, be sure to provide customer service with all your measurements and confirm they are correct before placing an order.
Part 3: Step-by-Step – Detailed Steps for Replacing the Handle Without Disassembling the Window
Now, let’s get into the core practical steps. Please be patient and proceed step by step.
Step 1: Safety Preparation and Removal of the Old Handle
Clean the Work Area: Clear the windowsill and sash of any objects. Place a soft cloth on the windowsill and sash to protect them from falling tools or parts and damage.
Locate the Setscrew:
Most handles have a small hole at the bottom that contains a socket head screw.
Some handles have a small decorative cover on the front that can be pried open with a blade to reveal the Phillips/slotted screw underneath.
Use an appropriately sized socket head wrench or screwdriver to loosen the setscrew by turning it counterclockwise.
Removing the Handle: Once the screw is completely loosened (note: it does not need to be completely removed), the handle should be able to be pulled outward. If it is very tight, gently rock it from side to side to remove it. Do not use brute force!
Removing the Base (if present): Some handles are one-piece; the handle and base must be removed together. Some windows are split. After removing the handle, a base remains screwed to the window. If the base needs to be replaced, continue using a screwdriver to remove the screws securing it.
Step 2: Inspect, Clean, and Lubricate (Critical Step)
After removing the old handle, you will see the window’s actuator opening and the exposed core (if it is attached to the window).
Inspect the core: Observe the core for rust or significant wear. If not severely worn, it can continue to be used.
Inspect the actuator: Shine a flashlight to check the internal actuator for signs of damage.
Cleaning: Use a soft cloth to remove dust and debris around the mounting holes.
Lubricate: Spray a small amount of lubricant into the actuator hole and the exposed locking mechanism. Then, rotate the core several times (you can use pliers to gently grip and turn it) to allow the lubricant to penetrate thoroughly and ensure smooth future operation. This is the secret to a better window experience!
Step 3: Install and Adjust the New Handle
Align the Square Hole: Align the square hole of the new handle with the square core on the window (or use the included handle insert).
Fitting the Surface: Place the handle base flat against the surface of the window sash.
Preliminary Fixing: Hand-tighten the retaining screw a few turns, but do not fully tighten it yet.
Functional Test: This is a crucial step! Rotate the new handle 90 or 180 degrees to test whether the window locks and opens smoothly. Check that all locking points extend and retract properly. If any sticking or locking issues occur, check that the core dimensions match the correct fit and that the installation position is secure.
Final Fixing: After confirming proper function, tighten the retaining screws thoroughly with a tool. Be careful not to strip the threads.
Apply the Decorative Cover: If the new handle has a decorative cover, attach it now.
Step 4: Final Inspection and Cleaning
Repeat the window handle several times to ensure smooth opening, closing, and locking.
Clean the new handle and sash with a soft cloth, leaving the window looking pristine and clean.
Pack all tools and dispose of the old handle.
Part 4: Troubleshooting – What to Do When You Have a Problem
Even with thorough preparation, unexpected situations can occur. Don’t panic; refer to the following solutions:
Problem 1: The screw won’t turn or is stripped
Solution: Apply a drop of lubricant or WD-40 to the screw and let it soak for a few minutes before trying again. If the screw cap is stripped, try applying pressure with a larger screwdriver or using a specialized stripped screw extractor kit. In extreme cases, a very small drill bit can be used to drill out the screw head.
Problem 2: The old handle can’t be removed
Solution: Make sure all screws are loose. If the handle is rusted from long-term disuse, lubricate the connection between the screw and the handle with lubricant, gently rock it left and right, and pull outward. Never hit it with a hammer.
Problem 3: The new handle won’t turn or is stuck after installation
Solution: Stop operation immediately. First, check that the handle fits perfectly (the most common cause). Second, check that the new handle itself operates smoothly (test it by turning it dry without installing it on the window). Finally, review whether the lubrication step was completed properly.
Problem 4: The hole spacing of the new handle does not match the old one.
Solution: This is a purchase error. The only solution is to purchase a new handle with the correct hole spacing. If the old mounting holes are visible, fill them with glass glue or putty, let them dry, sand them smooth, and then cover them with paint.
Problem 5: The window’s actuator is broken.
Solution: If the window still won’t lock after replacing a new handle that’s confirmed to be compatible, the problem may be with the actuator or locking point inside the window. This is a more complex situation and may require more in-depth repairs, even requiring a professional repairer. However, this goes beyond the scope of this “just replacing the handle” section.
Part 5: Care and Maintenance – Keeping Your New Handle Looking Like New
Proper care can significantly extend the lifespan of your window handle.
Regular Cleaning: Wipe with a soft cloth. Avoid using strong acids or alkalines, as they can corrode the surface coating.
Regular Tightening: Check the handle’s fixing screws every six months or a year for signs of looseness. Tighten them immediately if necessary.
Regular lubrication: Add a small amount of lubricating oil to the transmission mechanism once a year to keep the system smooth.
FAQ
Q1: How do I determine the core size and hole spacing of my window handles?
A: The most accurate method is to use a vernier caliper to measure the width (in mm) of the old core and the center-to-center distance (in mm) of the base screw holes before or after removing the old handle. If the core was removed with the old handle, measure the core on the old handle.
Q2: Can all window handles be replaced this way?
A: This method can be used on most modern aluminum and plastic-steel window handles. Some very old wooden windows or windows with special construction may not be suitable, but the principle is the same, so you can try disassembling and observing first.
Q3: How long does it typically take to replace a handle?
A: For an experienced operator, it usually takes 10-20 minutes. If this is your first time, including measuring, purchasing, and installation, it is recommended to allow 1-2 hours to ensure a leisurely pace.
Q4: Will replacing the handle myself affect the window’s seal and warranty?
A: It won’t affect the seal, as the sealant and window frame structure aren’t affected. Regarding warranty issues, if your windows are still under manufacturer warranty, replacing non-original handles yourself may void the warranty on the handle itself, but it generally won’t affect the warranty on the entire window. If you’re unsure, consult the window manufacturer first.
Q5: What’s the approximate price of a new handle?
A: Prices range widely, from standard models in the low teens to high-end brand names costing over a hundred yuan. A typical household would choose a zinc alloy handle for around 50-100 yuan, which is considered quite good in terms of quality and feel.
Q6: If the window is a tilt-to-tilt or top-hung window, are there any special considerations when replacing the handle?
A: The operation of a tilt-to-tilt handle is more complex (different rotation angles result in different functions). When purchasing a new handle, ensure that it functions identically to the old one (i.e., it activates the same opening mode at the same rotation angle). Careful testing after installation is essential to ensure that all three (or two) positions (casement, tilt, and lock) function correctly.
Conclusion and Call to Action
Congratulations! After reading this detailed guide of nearly 10,000 words, you’ve gone from a “novice” who knew nothing about window handles to an “expert” who can guide others. Replacing window handles is far less complex and intimidating than you might imagine. It’s simply a delicate craft that requires a little patience, care, and the right technique.
Now, it’s time to put your knowledge into action!
Don’t put up with that loose, stuck, rusty, or outdated handle anymore. It’s impacting your home experience and safety every day. Take a few minutes today, walk to your window, carefully examine your window handle, and measure the key details according to the instructions in this article. Then, boldly choose the new handle you like!
Start your home renovation by replacing a window handle. When you complete this upgrade, you’ll gain more than just a brand new window; you’ll also experience a sense of accomplishment and a deeper sense of control over your living space.
Take action now and make every window opening and closing a smooth and comfortable experience!